Builder Grade to Custom Made – DIY Fix for 1980s and 1990s Honey Oak Kitchen Cabinets
My dated, honey oak kitchen cabinets, circa 1989, had to go! While an expensive kitchen reno wasn’t in the cards, there was still plenty I could do to make my lame kitchen, my dream kitchen. Read on to see how my cabinets went from builder grade to classic, custom made – NO power tools required. This IS the DIY fix for basic honey oak kitchen cabinets!
In this post I’ll focus, mainly, on the area of the two cabinets above the peninsula. These two cabinets had three wood doors. See before pics:


The first thing I did was take those three wooden doors to a local Amish furniture maker. They cut out the middle wood panels of these doors and replaced them with glass, all for about $130. While they were working on that, I went ahead and degreased/sanded, primed and painted the upper cabinets using White Dove, by Benjamin Moore. I pined over countless white paint colors, endlessly it seemed, until I chose White Dove and I’m SO glad that I did! It is a soft white, not at all too stark.
I also chose to go to Benjamin Moore to get their paint which is formulated for kitchen cabinets, specifically. It is called Advance. If I were painting a wall, I might choose to go to my local home improvement store and simply have a color match. However, painting kitchen cabinets is a whole different animal. So I went straight to the source. Benjamin Moore’s Advance kitchen cabinet paint is formulated so that it levels off quickly, ensuring a smooth finish. It’s a little bit more expensive, but a smooth finish is pretty important when you’re talking about kitchen cabinets, so it’s definitely worth it.
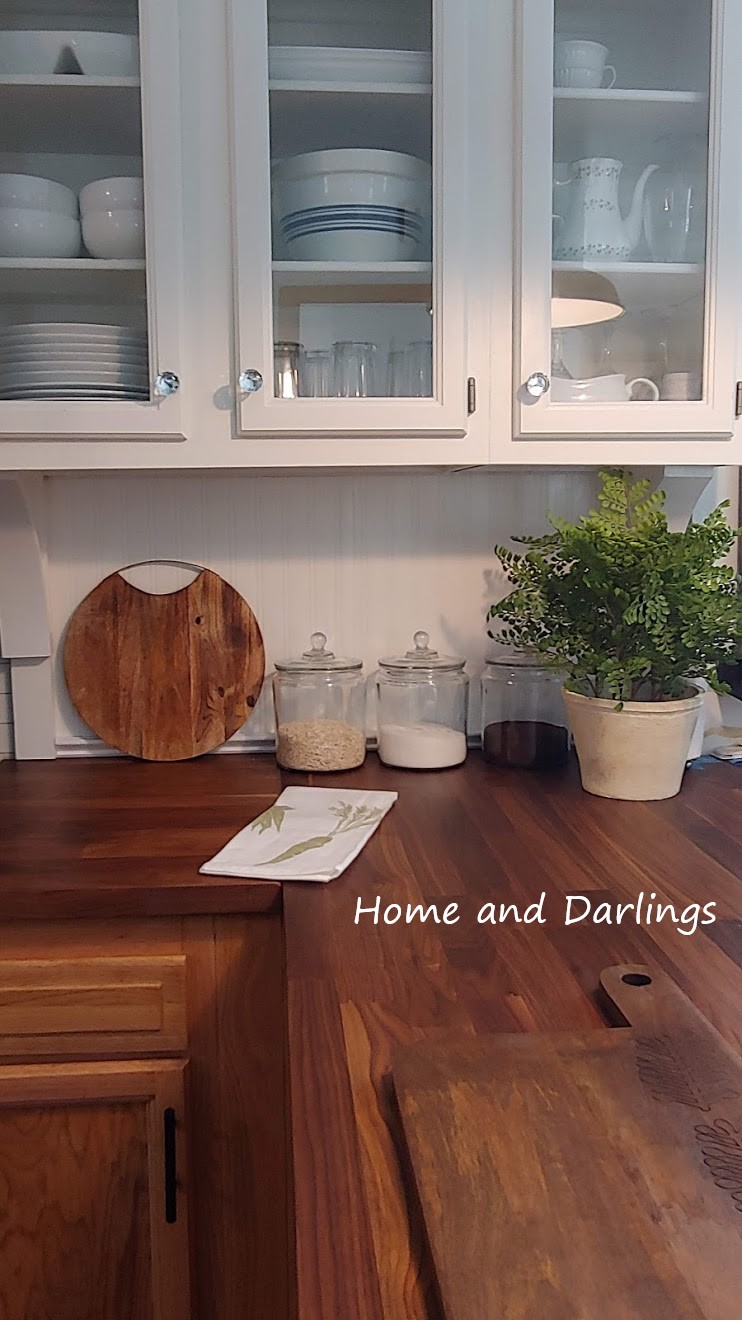
I still need to paint the soffit to match the cabinets, but take a look at how far this little space has come:


I’m still working on my kitchen, so subscribe and keep yours eyes peeled for the full kitchen update!
Here’s how this area went from builder grade to classic, custom made:
- Under the cabinets I used this awesome paintable beadboard wallpaper from Graham and Brown instead of dealing with wood and saws and tools that I don’t have. It’s pre-pasted and was REALLY very easy to hang! 🙂 I painted it the same White Dove I used on my cabinets, two coats.
- On either side of the beadboard wallpaper I added a wood corbel, similar to these. They come with a picture hanger type insert on the back so they’re pretty simple to hang too. The two corbels with the beadboard wallpaper in between create a really beautiful classic, built-in look. SO different than what was there!
- These Crystal cabinet knobs work well with painted cabinets. They’re far enough away from the door to avoid fingernail scratches.
- Added trim below the beadboard wallpaper and trim above the cabinets. I had my local home improvement store cut the trim to fit and I used this Loctite glue to secure. NO nails or tools or nail gun needed! EASY! (Still need to paint the soffit to match the cabinets.)
- The new countertop is the Ikea walnut Karlby. LOVE IT!
- I washed the hinges and spray painted them with Rust-Oleum 249130 Universal All Surface Spray Paint, 11 oz, Metallic Satin Nickel
This post contains affiliate links which may send me a few coins. I only recommend what I love and it never costs you a cent. If you like what you see, go through me! 🙂
Lower kitchen cabinets:
- I didn’t want my lowers white, since I knew that, in my house, it’d likely be a mess pretty quickly. Plus, I wanted a bit of an earthy, grounded feel to the kitchen with a contrast to the white and darker walnut countertops. So I sanded and protected the bottom cabinets with the ONLY true CLEAR coat that I have found: General Finishes Flat Out Flat Topcoat, Quart. It is PERFECT. I searched high and low, even traveled to another state to get the product (now it’s on Amazon here!). In the end, I found that while others claim to be a “clear coat” for natural wood, they are not at all clear and they will yellow and/or darken the wood. It was important to me to keep the lower cabinets as close to a natural wood as possible. I wanted no red/orange undertones AGAIN and needed them to stay light for that sharp contrast between the cabinets and the countertop. If you’d like to do the same, save yourself the trouble and get General Finishes Flat Out Flat water based topcoat, I’ve already done the footwork for you! 🙂 It goes a LONG way! I used less than one quart for the entirety of the lower cabinets.
- Bottom cabinet pulls: 3″ Black Cabinet Pulls Matte Black Drawer Pulls


If you’ve got those ’80s/’90s kitchen cabinet blues, then I hope this post has inspired you to make a change in your kitchen! If so, let me know! 🙂
GET THE LOOK:
- Paintable Beadboard Wallpaper from Graham and Brown (seen under the upper cabinets)
- Wood corbel (two seen under the upper cabinets, on either side of the beadboard wallpaper for a built-in, custom, classic look)
- Crystal cabinet knobs (seen on upper cabinets)
- Loctite glue (for easy trim installation without nails!)
- Rust-Oleum Metallic Satin Nickel spray paint, for hinges
- General Finishes Flat Out Flat Topcoat, THE BEST product to protect raw wood without turning yellow or darkening the wood (seen on lower cabinets)
- 3″ Matte Black Cabinet Pulls (seen on lower cabinets)
- Art 3D Peel and Stick Subway Tile (seen above stove)
You may also like:

Home Body, by Joanna Gaines is in stores for more than double what you can get it for right here!


Related Posts

Simple Modern Farmhouse Spring Kitchen
Spread the love Spring is here! So, I couldn’t wait to purge winter…
March 8, 2021
Ana | 24th Feb 21
Awesome ideas to turn builder grade to custom made! Love the white upper cabinets with glass inserts. The crystal knobs are the perfect finishing touch. I’m really into DIY projects– they’re so gratifying especially when you can keep them easy and affordable. Thanks for sharing your inspiring project.
Carolyn | 24th Feb 21
Thanks so much Ana!! I agree – I’m all about easy and affordable! 🙂
Mike | 24th Feb 21
Very interesting. I live DIY and especially the see through white cabinets. Make it so much nicer when you can see what’s behind the cabinet door. Thanks.
Carolyn | 25th Feb 21
Thanks, Mike! Yes, I’m loving the glass doors!
Lisa | 24th Feb 21
Very inspiring! The glass fronts and white paint really lightened things up in your kitchen. I’m a big fan of subway tile. Thanks for sharing!
Carolyn | 25th Feb 21
Thanks, Lisa!! Yeah, the glass doors make me smile! 🙂
Sarah | 25th Feb 21
This DIY project turned out fantastic. I love how the contrast in this white and wood kitchen really makes everything pop.
Carolyn | 25th Feb 21
Thank you, Sarah!! 🙂
Gina Abernathy | 26th Feb 21
Very pretty! I love the white uppers and the wood lowers. The white certainly brightens up your kitchen.
Carolyn | 26th Feb 21
Thanks, Gina! I think so too! 🙂
60 Stylish Two-Tone Kitchen Cabinets You Will Love | 28th Apr 23
[…] Image by Home And Darlings […]
60 Stylish Two-Tone Kitchen Cabinets You Will Love - Fresh Diy Home | 26th May 24
[…] image source […]
50 Zweifarbige Küchenschränke Ideen | 24th May 25
[…] Image by Home And Darlings […]